This gallery contains 42 photos.

This gallery contains 42 photos.
Thought I’d try my hand at a mecha utilizing some of the curved window pieces I like to use. The original idea was for a mecha on a much smaller scale, but with the geared pieces it had to get a little larger. By the time I added all the brick, poor red mecha was having some difficultly staying pose-able.

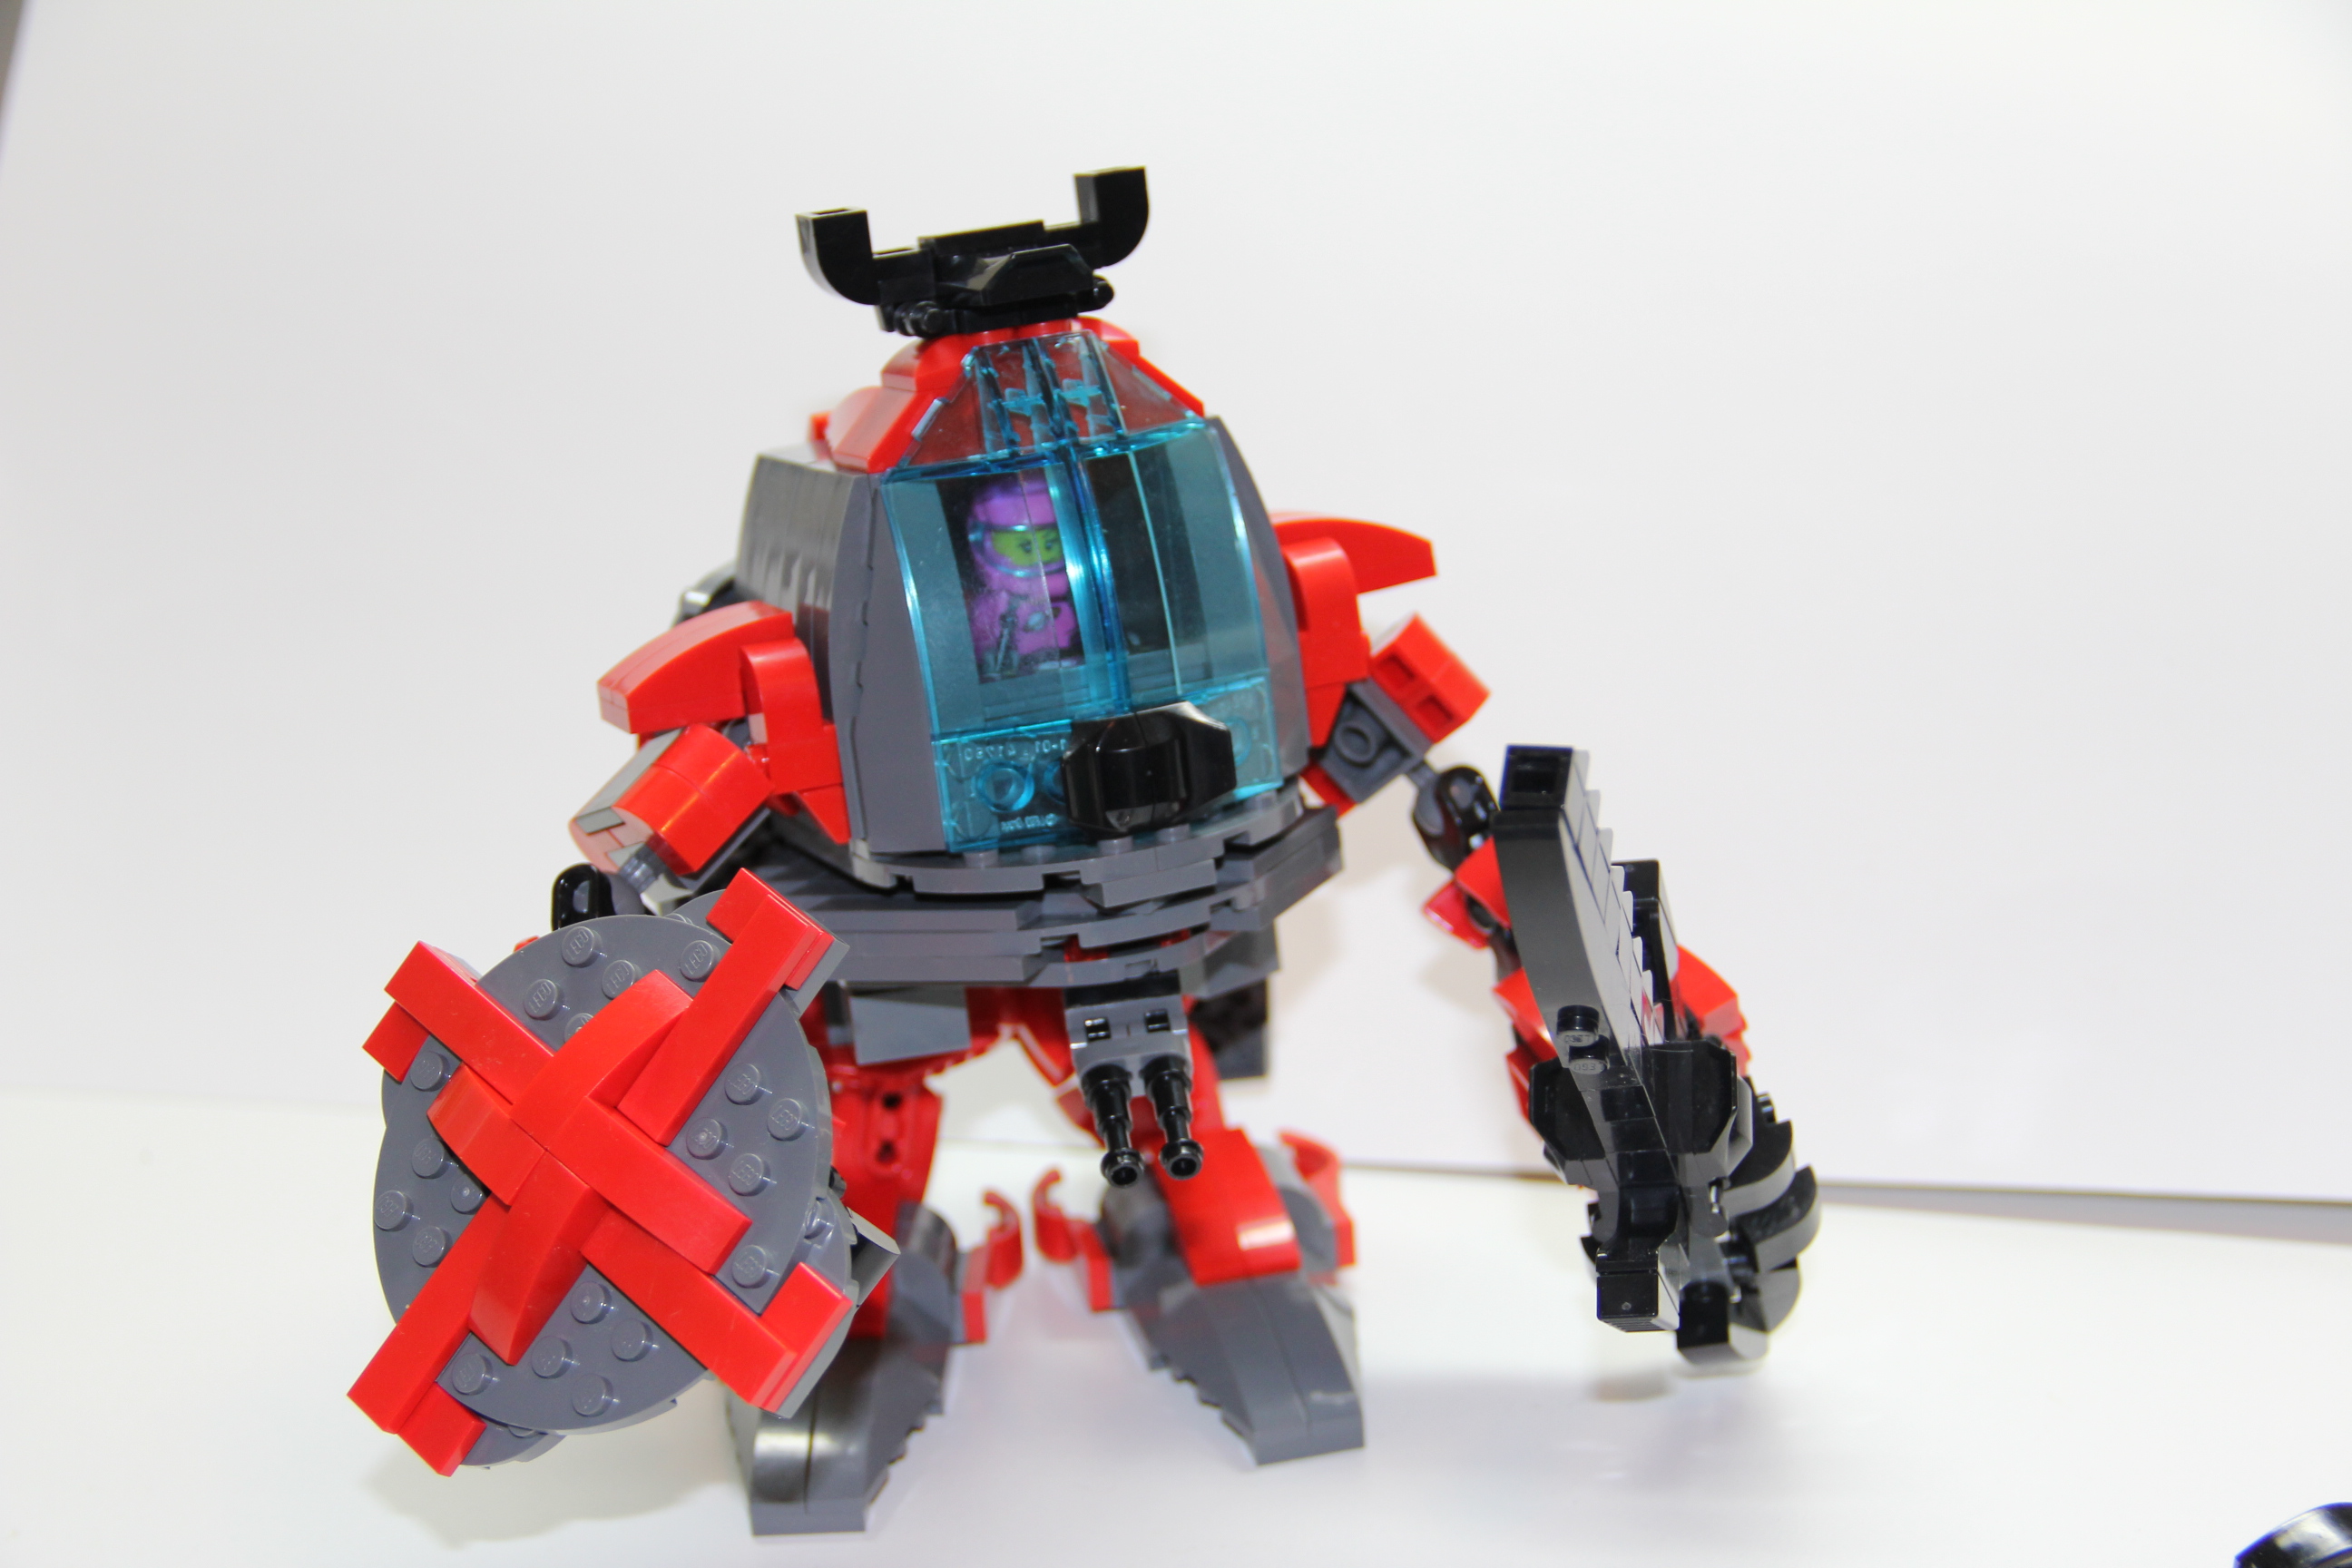
Front on Pose with Sword and Shield
Everyone knows that all mecha need swords. Despite all the high tech, it still boils down to basic swordsmanship. You can see Red Mecha’s “zapper” (as Cael calls it) laying useless to the side.

Side view with Sword and Shield
You can kind of see the little “kabuto” hat/helmet I was trying to give this guy to match the little “mustache” on the front glazing. You can also see the serrations on the sword.

Side view of Shield and Sword
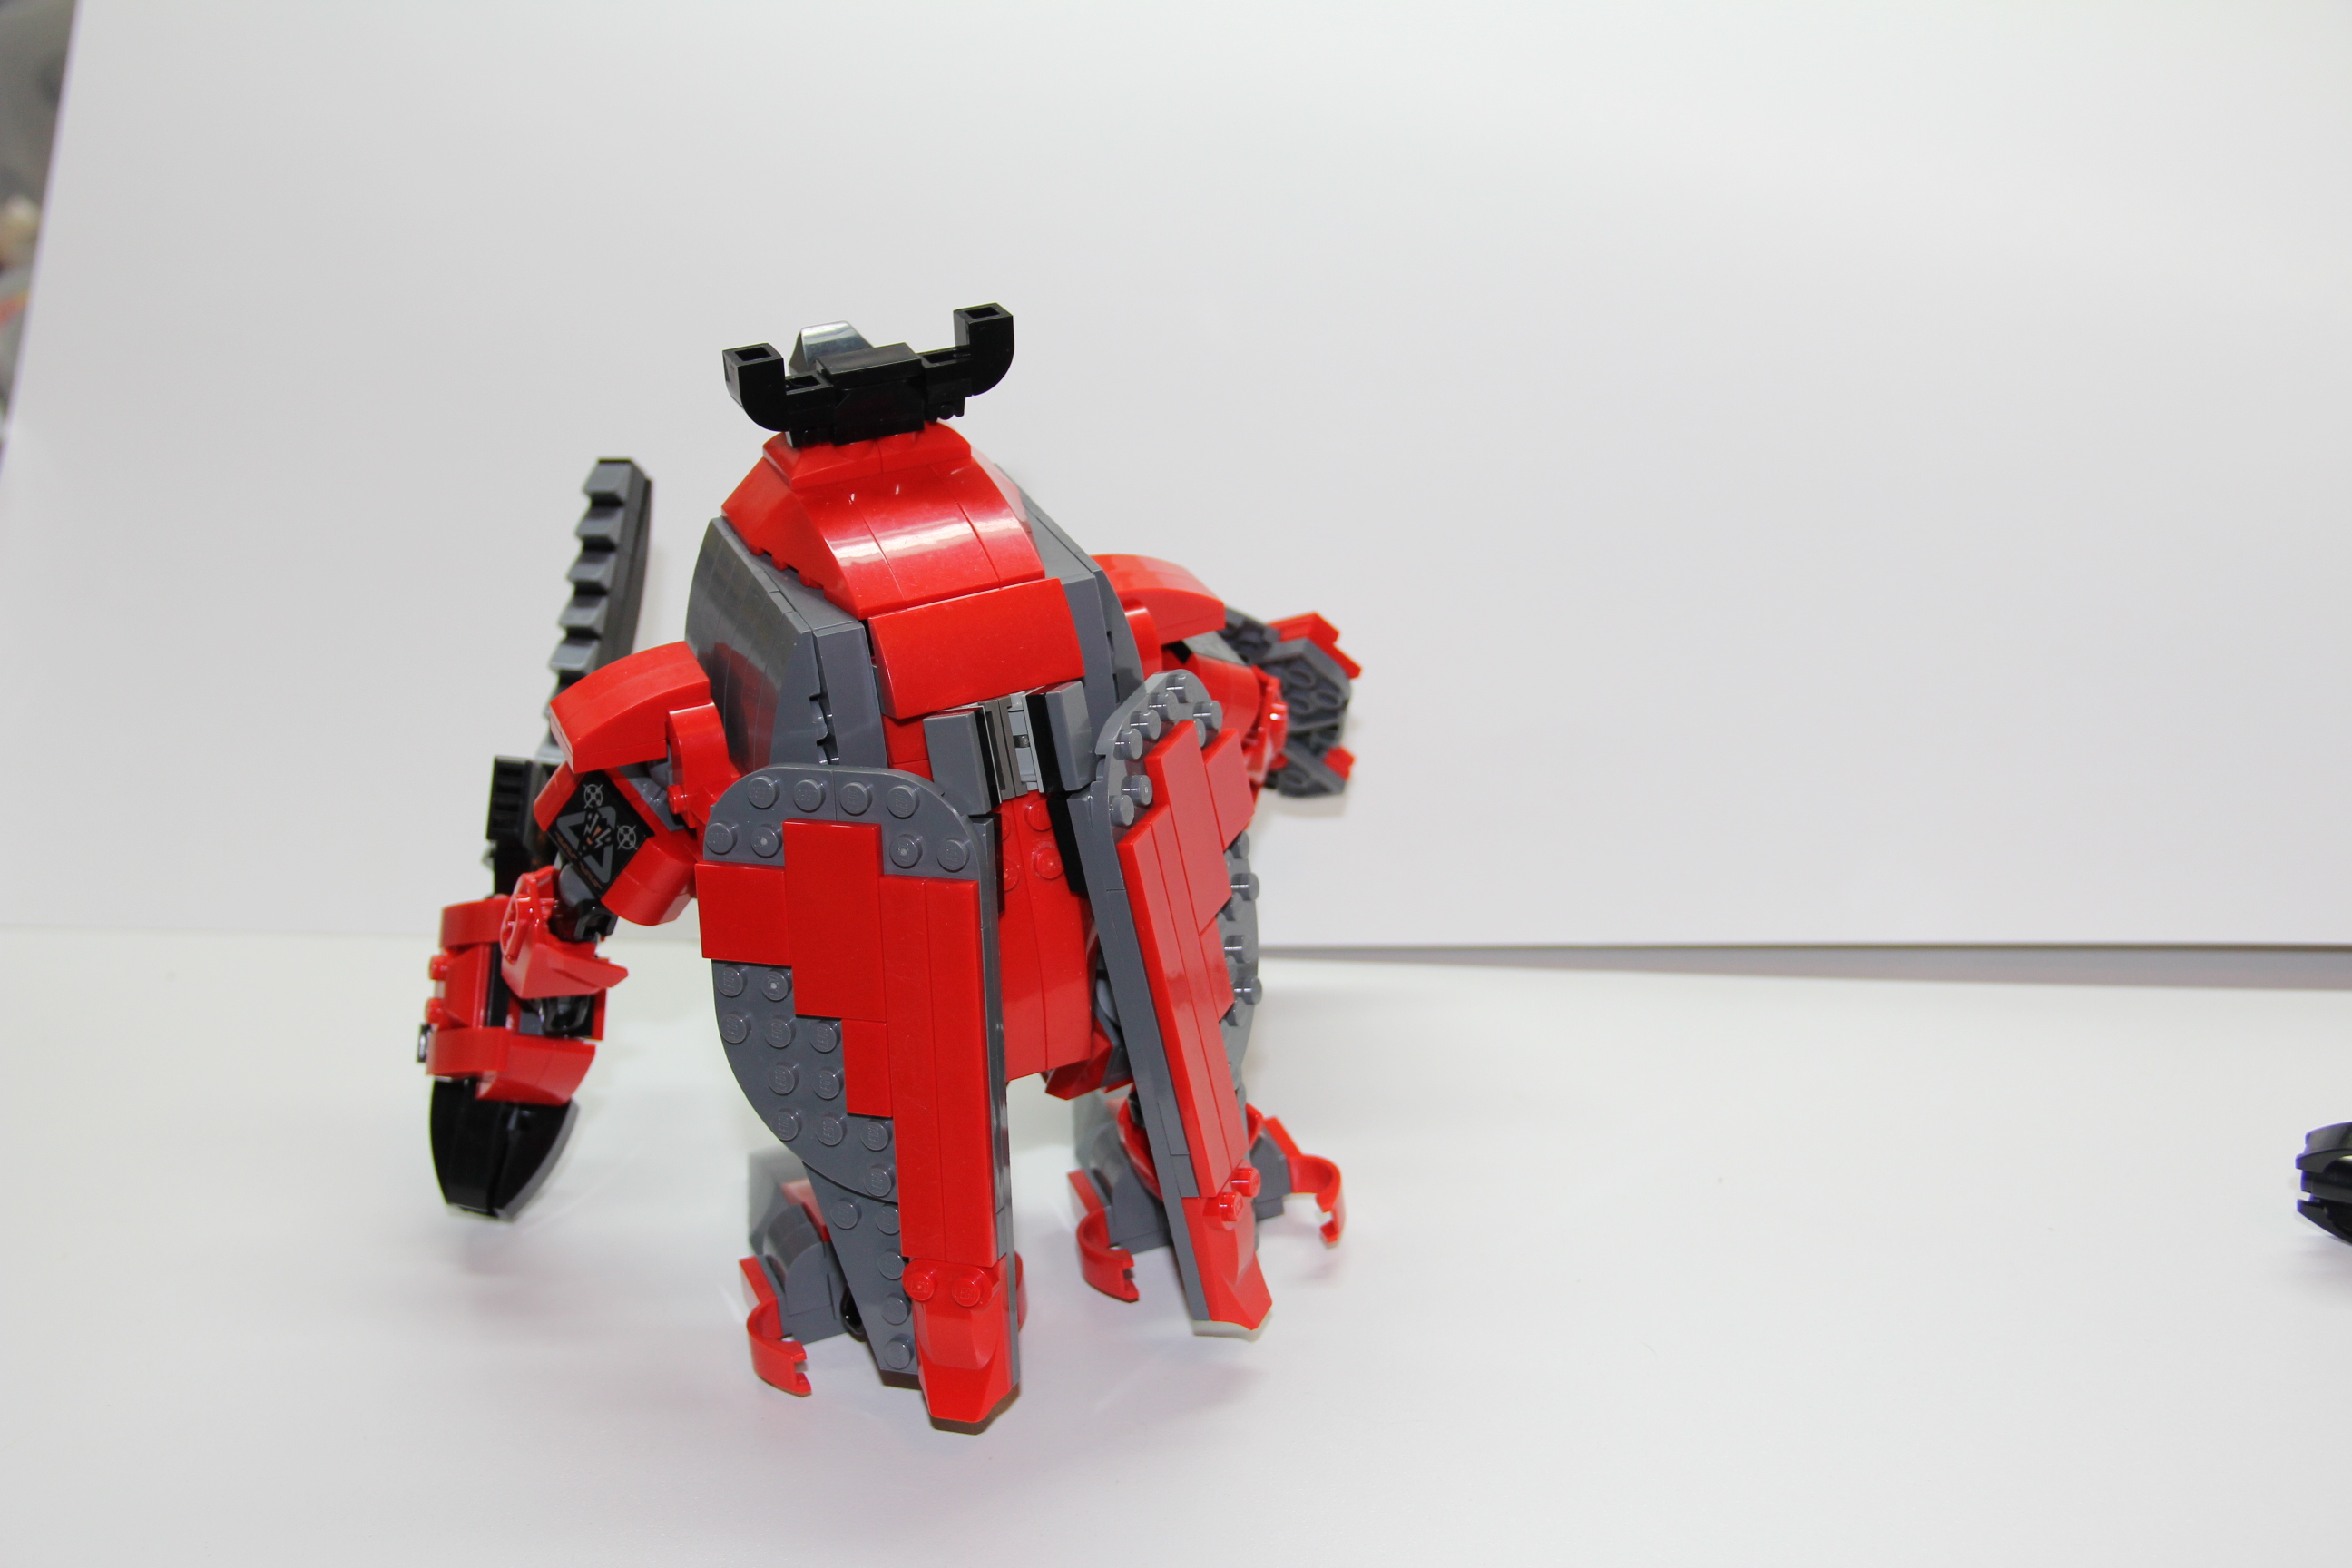
Rear view with wings closed and angled
Originally, I wasn’t going to add wings but thought they would look alright. They add a lot of unnecessary weight, however, and so I had to drop the rotating engine pieces I wanted to add.

Wings partially opened
You can see the “sneaker-ish” shoes with wing-a-lings. You can also see the mecha’s back. The wings don’t look too bad considering they were an afterthought.

Wings fully extended
I also wanted to add a bit more to allow the wings to flip up horizontally, but again, the weight.

Rear with opened hatch
Access to the red mecha, the “back” hinges up. Unfortunately, you can’t see the interiors too well, I need a better lens for close-ups.

Clenched fist and Raised Zapper
Red Mecha holding the zapper with clenched fist. I supposed you could also equip the shield in combination.

Red Mecha with Zapper
The bits with the grey vents is supposed to be a magazine. Any longer and it would have made the zapper even more unwieldy.
Point blank zapper

Side view of Red Mecha with Zapper

Red Mecha ready to lift off
Or ready for a hug, I suppose.

Standing Red Mecha
You can see the “hands” pretty good here. They actually grip things fairly well.

Red Mecha’s Weaponry

Red Mecha’s Weaponry
I actually wanted to do a long rifle as well, but it would have been too long and difficult to pose.
Extra Photos


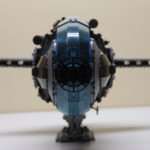
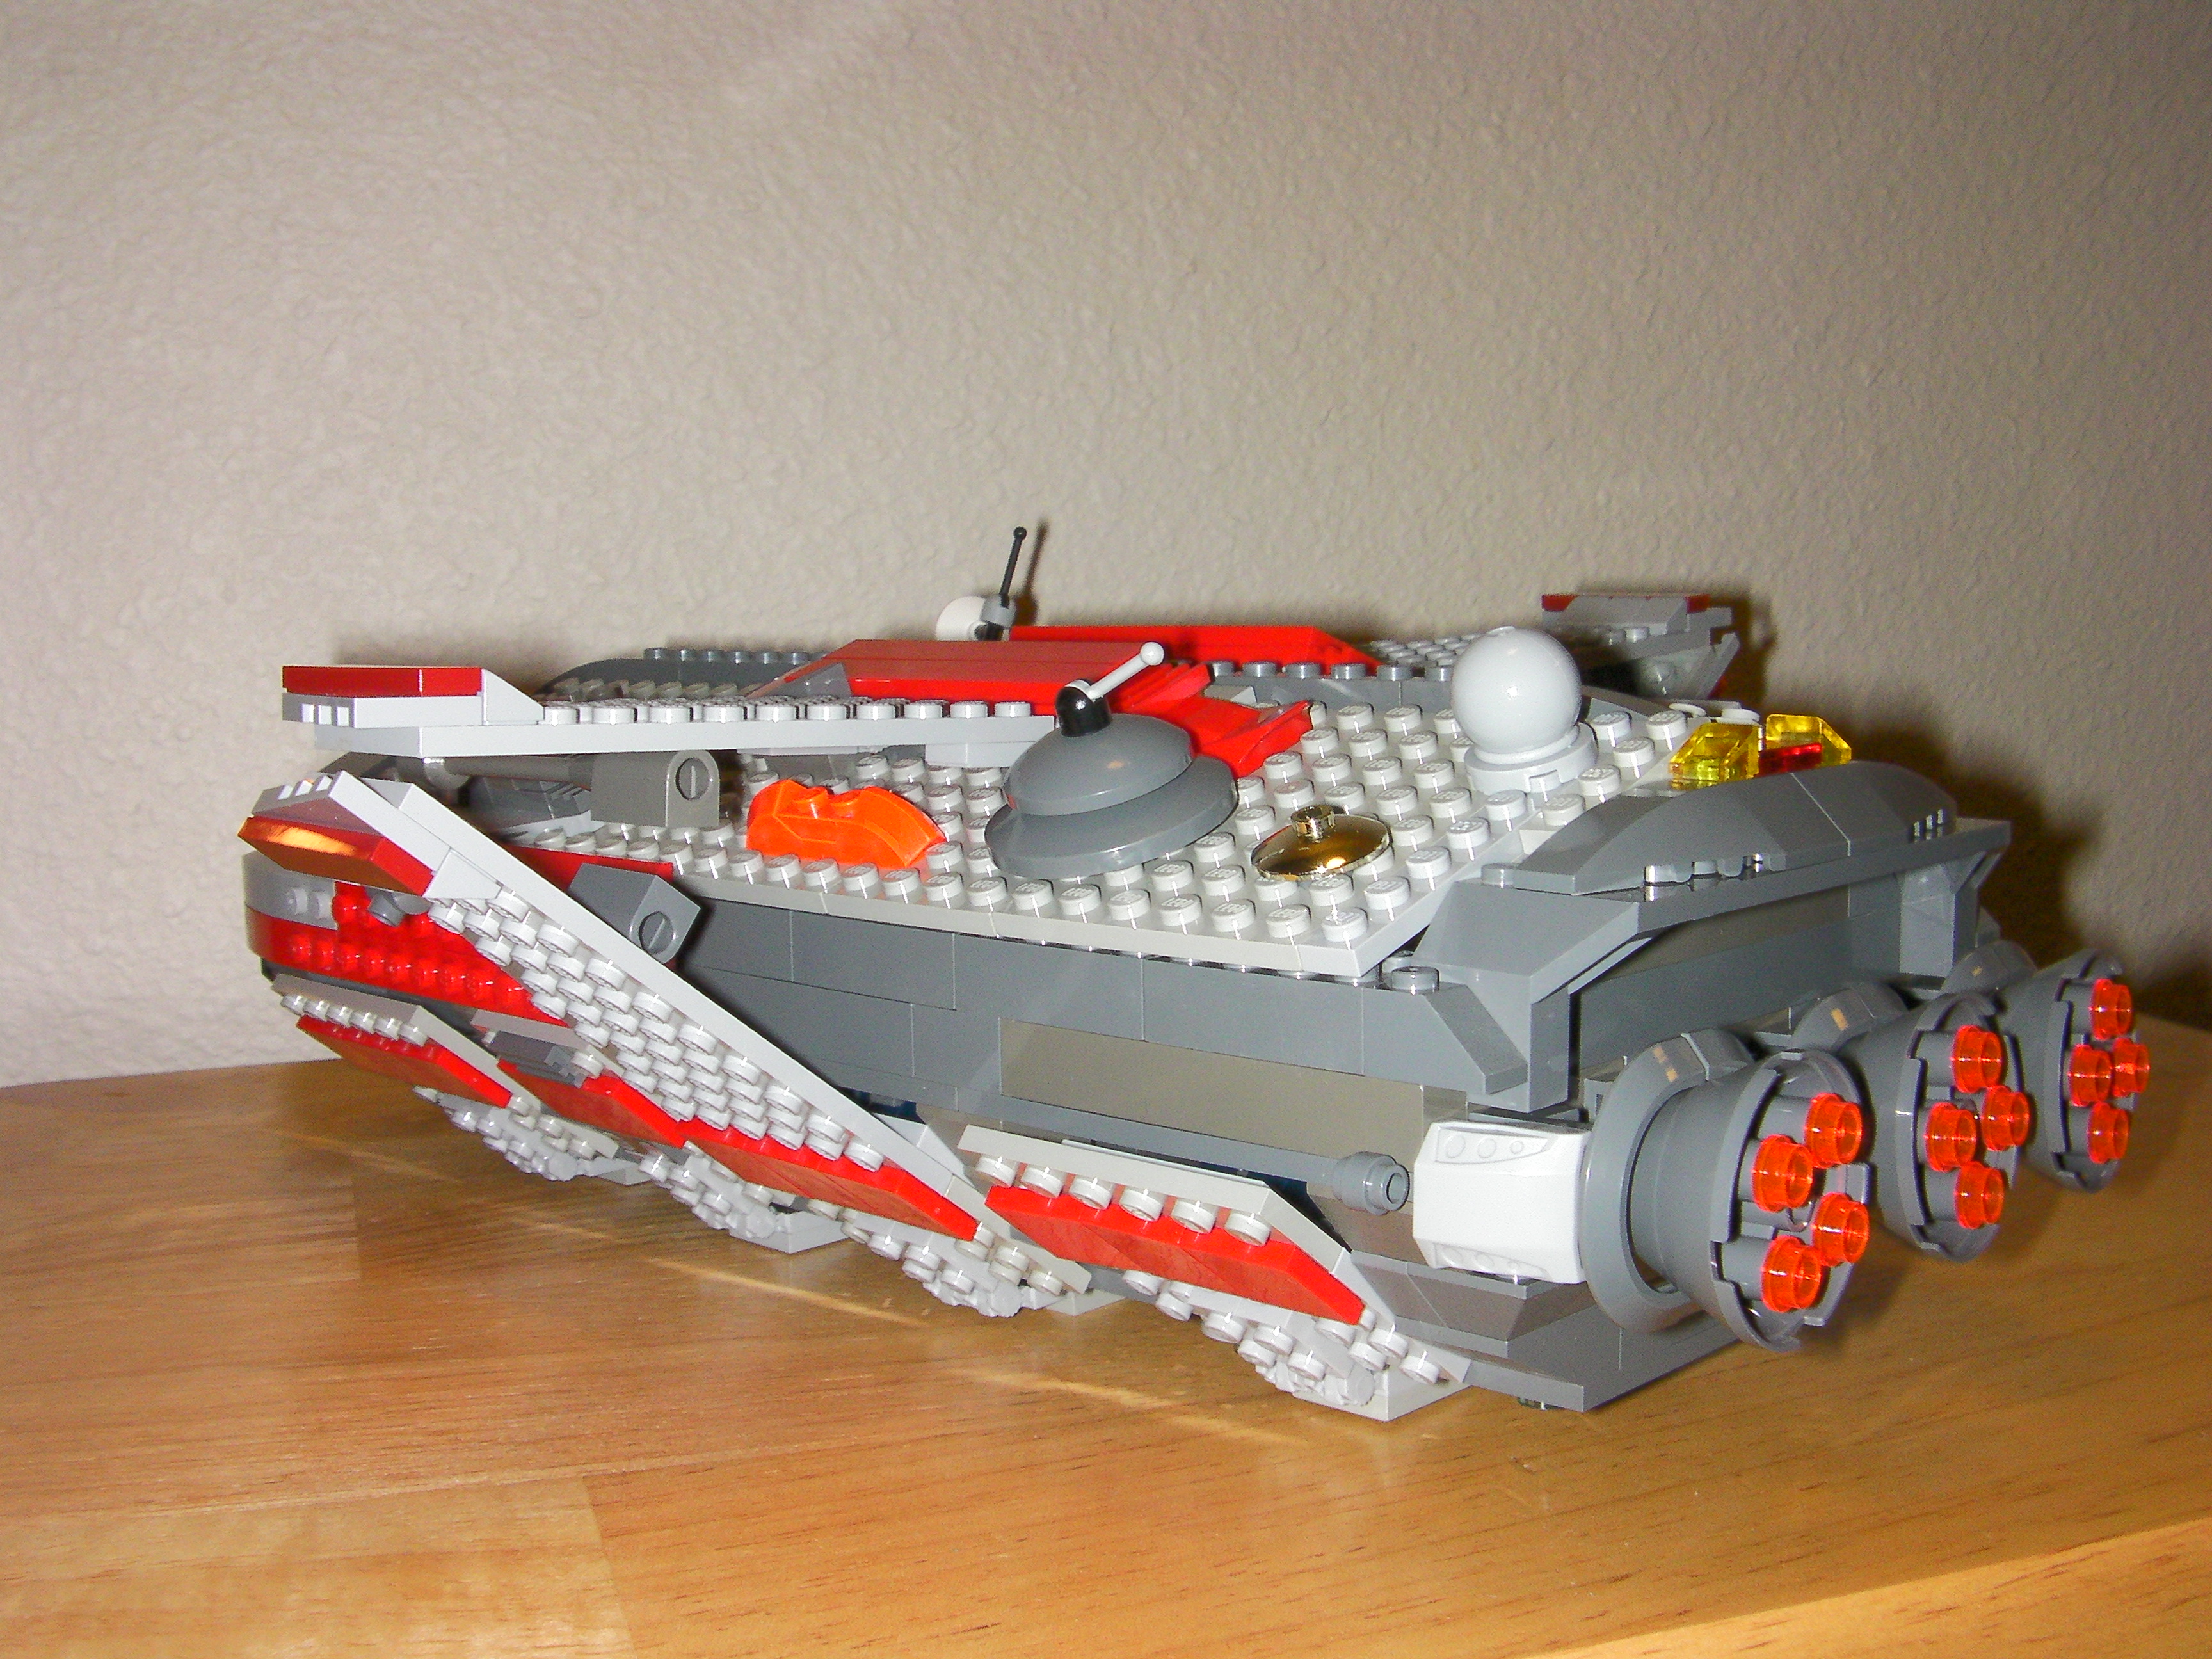
Finished off this Space MOC I’ve been fiddling with. As usual, I am missing all of the right pieces in the right colors. I think it could also use more and better greebling.

Space Marine Transport
You can see here how I’m missing the red curved piece; I actually have three of those in red, but not the mirrored piece for the other side. I’m sure its buried somewhere but I wanted to finish it so I could harvest these pieces for other projects. Actually, this whole MOC started with the front bit…the window portion turned sideways with the curved parts holding it in place. I may come back to this window configuration for another MOC but turn it vertical instead and see how that turns out.
Back left view of Space Marine Transport
You can see the old dark greys mixed in with the newer dark greys. Greebling looks kind of random to me. Originally the wings were going to be different, but they just ended up like this.

Back right view of Space Marine Transport
Sparse greebling on this side. I thought the engines turned out okay; I was playing around with using two “wheel wells” together and seeing how that would look framing the engine bits. I actually saw someone else using the pieces in this way for a building and was intrigued.

Right and under side of Space Marine Transport
A view from somewhat underneath showing the angles used. I think it would look better if the red angled “striping” in the middle extended all the way back. Maybe next time.

Left side of Space Marine Transport

Left side of Space Marine Transport with open hatch

Right side of Space Marine Transport with open hatch

Top view of Space Marine Transport
I’m happy with the overall basic shape of the MOC but not so much the wings. Without some kind of wings, it felt kind of awkward. Again, you can see how it could use more greebling.

Top view of Space Marine Transport with top removed
The framework of the Transport and interior. The interior has pretty much no greebling whatsoever; but there wasn’t a lot of room for it. Spacing was a little off on the “benches” so I had to stagger the Space Marines.

Back interior of Space Marine Transport
You can see I didn’t have any more of the right color arches. Also, the half heart hose greeble in the back there.

Front interior, cockpit, of Space Marine Transport
There is actually more to be seen than shows up here. A lot of instrument panels are hidden, but again, it could still use more greebling. I probably should have taken more shots as it was being built to see things more clearly.
Overall, its ok. It was mostly an experiment with the window pieces that turned into a transport. Next time will be better planned out and probably turned vertical.
I finished a space MOC I’ve been fiddling with for a while and thought I would try out some stop motion video with some basic software. It’s pretty basic, but the program was a lot easier and quicker than I thought it would be. Next time I’ll take a little more time to make it look nicer. For now, just testing out how it looks on here and how it views online. More pictures of the MOC to follow.